Saturday, February 10, 2007

Amaryllis Pollination Hack

Amaryllis Pollination And Propagation


If you have an Amaryllis you can easily hack it to produce seeds which you can then sow and produce even more plants that you can share with others, keep for yourself or sell.

Look at the image on the right. The stamen is the slender white stalk that's holding up the anther. The anther is the sack that holds the pollen. These are considered the male parts of a flower. This usually matures before the stigma.


The stigma is on the left and it is the tip of the female reproductive parts of the flower. Notice how the ends are curled back, this occurs a couple of days after the flower has opened and is ready to be pollinated.

If you want to propagate your Amaryllis it's really very easy. Cut the white slender stalk that's holding up the anther and tap it onto the stigma when it look similar to the stigma in the image above. If that seems too difficult then just take a small artist's paint brush and rub it up and down on the pollen. Now look at your paint brush and you should see there is a yellow dust like substance. Now take your paint brush and "paint" the tip of the stigma with the pollen you picked up on the brush.

Your flower soon will start to die because it has lived and completed it's purpose. Which was to attract a pollinator, which in this case was you. Leave the flower alone and let it die on it's own terms. If you were successful after a few days you should notice the swelling of the seed pod right behind the dying flower. Leave everything alone and about 5-6 weeks later your seeds should be ready. You'll notice the seed part start to split open and inside you'll find a lot of black paper thin seeds. Don't let them fool you those are the seeds and you want to sow those soon.

Do you have more than one Amaryllis? Are they blooming at the same time? Take the pollen from one plant and place it on the stigma of the other. It's a good way of making crosses of your Amaryllis bulbs. Your seedlings should be old enough to bloom by their third year.

If you start your seeds in soil using something like the Ghetto Greenhouse stand the seeds on their sides, or you can start them using the Baggie Method. I'll post photos soon of what my seedlings look like. When I do at the bottom of this post you should see "Links to this post" to help you keep track of them.

*edit*
On Sunday March 25th my first seed pod opened. I'll post pictures soon.

UPDATE: 

I started www.AmaryllisBulbs.org a blog devoted to growing Amaryllis bulbs and various tips. If you want to know what to do after the seed pods form check it out.


Here's a video I made showing you how to pot an Amaryllis Bulb.


and one showing you how to pollinate an Amaryllis flower.


Friday, February 9, 2007

Seed Scarification Hack-Sandpaper

If you're starting from seed and need to scarify several seeds using sandpaper can save you some time and hassle. Sometimes the seeds are too small to hold each one while you nick the seed coat or sometimes you have a lot of seeds you need to get started for planting in your garden.

Aside from the seeds all you need is just need a really rough piece of sandpaper to do this. You simply place your seeds on your piece of sandpaper like in the image and then place a second piece on top to cover your seeds.

Place one or both of your hands flat on the top piece of sandpaper and move your hands in a circle going clockwise then do it counter clockwise while pressing down. Repeat the circular motion going in both direction until you notice that you've nicked the outer seed coat sufficiently.

This is a quick and easy way to get many seeds ready for soaking in warm water, if you're not inclined to do nick them all one at a time.

If you're thinking of starting from seed consider starting them in a Ghetto Greenhouse or using the Baggie Method if you don't have the space to create a greenhouses from soda bottles. They're both easy and inexpensive methods methods of starting your own plants from seeds.

Tuesday, February 6, 2007

Use For Pizza Table

In this previous blog entry I mentioned those plastic things that are put on top of pizzas to keep the box from touching the cheese.

I've found another use for them.

A lot of my plants are rather small and all are growing on a shelf near a window. Since so many of the plants are small and in small pots like the two in this photo I find it necessary to add something underneath the second row of plants so that the first row of plants doesn't block the available light. So I can use these plastic things to create "stadium seating" on my plant shelf and allow light to reach all of my plants. In the picture the plant below is a cutting of a cacti someone gave me that I'm trying to root. The plant sitting on the plastic table is actually two bulb offsets of Ledebouria socialis commonly called 'Silver Quills.' They're a good plant to grow in an indoor bulb garden.

If you're growing African Violets under lights these little pizza tables could help you raise some of the shorter plants up higher so that they're closer to the lights.

Sunday, February 4, 2007

Humidity Trays-Hack


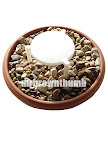
Many houseplants benefit from sitting in a humidity tray especially during the winter months when our homes are heated and the air can be quite dry. You can go out and spend some money of trays specifically designed for this purpose but if you're smart you can hack a humidity tray out of anything that will hold some water. For example a Tupperware container that is longer than it is deep, cutting out the bottom 2-3 inches of an empty milk jug, the tops of bottoms of take out containers or saucers that may have come with a pot. Just fill whatever container with enough pebbles so that it reaches the rim and then fill with water.

As the water evaporates it raises the ambient humidity around your plants-you may have to refill the water in the tray once a day if there is a lot of sun or it is particularly warm in your home. The one thing you want to look out for is that the bottom of your pot (and roots) are not sitting it water. This can be deadly as excess water contributes to root rot. Make sure your pebbles are high enough to make sure this doesn't happen.

Yesterday while eating a pizza I began to wonder about the person that invented those plastic mini tables that are placed on the center of a pizza to keep the box from coming in contact with the cheese and toppings. Eventually my mind wandered to the possible uses for this plastic thing and I realized it could be used in humidity trays to keep your pots up and off the water eliminating any chance that your plant roots will sit in water (see attached image) and rot.

I still don't know who invented this thing but I'm going to keep thinking of uses in the indoor/outdoor garden for this thing and will post about them as I come up with them. If you can think of any fee free to leave a comment.

Recent Garden Hacks